Setup local Business Central - Contribution Pilot
Hello there 👋
as you may already know, Microsoft announced in September ‘22 at BC TechDays1 in the Collaborating on Business Central’s open source platform2 session they are adding community members to their contribution pilot. If you didn’t make it to the eventor session, don’t worry. You can watch the sessions on the @mibuso.com YouTube-Channel3.
They also provide all previous NAV TechDays sessions in their YouTube-Playlist4. I definetly recommend you to visit their channel3. Their is so much valuable knowledge. A huge thanks to the organizers, partners and speakers making this event possible!
Before we start, you may have asked yourself: “Why would you add it yourself? Isn’t this Microsoft’s job?” Good question. Personally, I think there are so many possible answers to this, that I’ll leave the topic open for another blog post. For now, I would just leave this tweet by Natalie Karolak5, which more or less covers the topic imho:
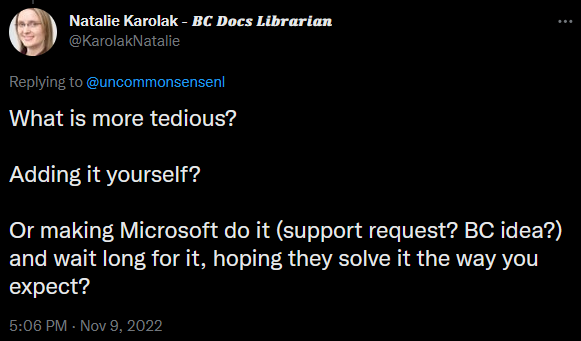
Source: https://twitter.com/KarolakNatalie/status/1590375302227972099
Well… this blog post is not about the whole contribution pilot project itself. I think that Open Source is a huge step and a big opportunity for the BC Community to make the product even better than it already is today. But that’s another story.
Let’s focus on the technial part itself. As with any new project, chances are high that you’ll need to setup some requirements before you can develop locally. Especially in this different ecosystem it might not be as intuitive if you’ve never done it before. It’s not our usual environment, as we would normally load the dependenies by setting the application and plattform property in our app.json manifest file.
In the following steps, I describe how to setup a local development environment, so that you would be able to make changes to the Base Application and publish these changes.
Setup local development environment
This whole step is rather optional, since you most likely already have one or multiple containers up-and-running.
In the BC TechDays sesion2 they run the ./Modules/.AL-Go/localDevEnv.ps16 PowerShell script. However, I use my own PowerShell Script New-BcContainer.ps1 which you can find here: https://github.com/christianbraeunlich/bccontainerhelper-scripts. The repository itself, follows the wise words of Freddy Kristiansen: “Keep the script, not the Container”7.
You need the PowerShell module BcContainerHelper8 installed and imported.
Ofcourse you can use your own script or simply use the provided script by Microsoft:
$containerName = 'mydemo'
$password = 'P@ssw0rd'
$securePassword = ConvertTo-SecureString -String $password -AsPlainText -Force
$credential = New-Object pscredential 'admin', $securePassword
$auth = 'UserPassword'
$artifactUrl = Get-BcArtifactUrl -type 'OnPrem' -country 'w1' -select 'Latest'
$licenseFile = '<Path to license file>'
New-BcContainer -accept_eula `
    -containerName $containerName `
    -credential $credential `
    -auth $auth `
    -artifactUrl $artifactUrl `
    -includeTestToolkit `
    -includeTestLibrariesOnly `
    -licenseFile $licenseFile `
    -includeAL -doNotExportObjectsToText `
    -updateHosts
Source: https://learn.microsoft.com/en-us/dynamics365/business-central/dev-itpro/developer/devenv-set-up-an-environment#set-up-a-business-central-docker-container
Just make sure to select w1 as country.
For the provided code example to work you need to provide a valid developer license.
Now let’s move on to the actual steps.
Clone the git repository
Before you can clone the GitHub repository9 you need access to it. To get invited you need to contact for example Jesper Schulz-Wedder10 as he mentioned in one of his tweets:
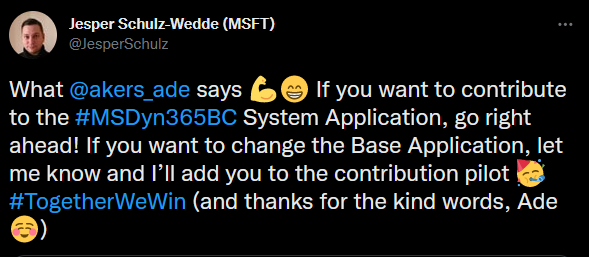
Source: https://twitter.com/JesperSchulz/status/1570770745491587073
By the time of writing it is a private repository. It may be that the repository will be made public at some point in the future.
The following code snippet can be used in your terminal. Just change the directory and enter the following commands:
git clone https://github.com/microsoft/BusinessCentralApps
cd BusinessCentralApps
code .
A successful cloning step looks similar to this terminal output:
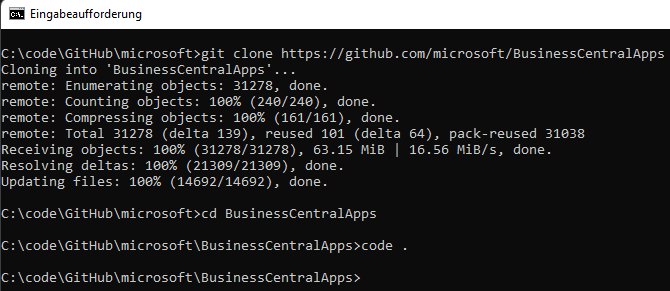
We change our directory to BusinessCentralApps. The command code . will open the current directory in VS Code and we will see the following structure in the VS Code Explorer:
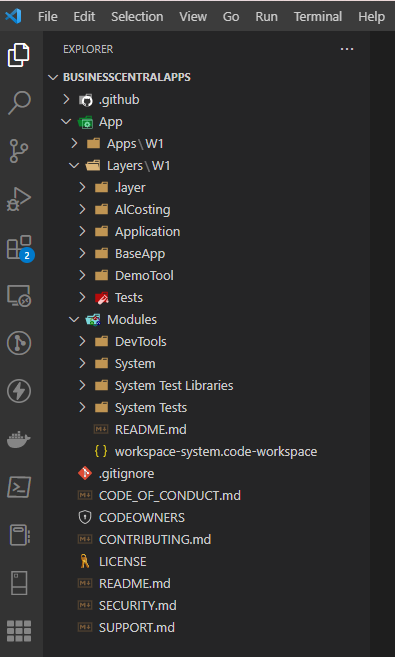
At this point, the opened folder contains multiple projects, so we need to open the workspace.
Open the Workspace
As we like to make contributions to the Base Application, we can simply open the predefined workspace by opening the BaseAndTests.code-workspace file. Enter CTRL + P and search for code-workspace. Click on BaseAndTests.code-workspace.

After opening the BaseAndTests.code-workspace file the content looks similar to this:
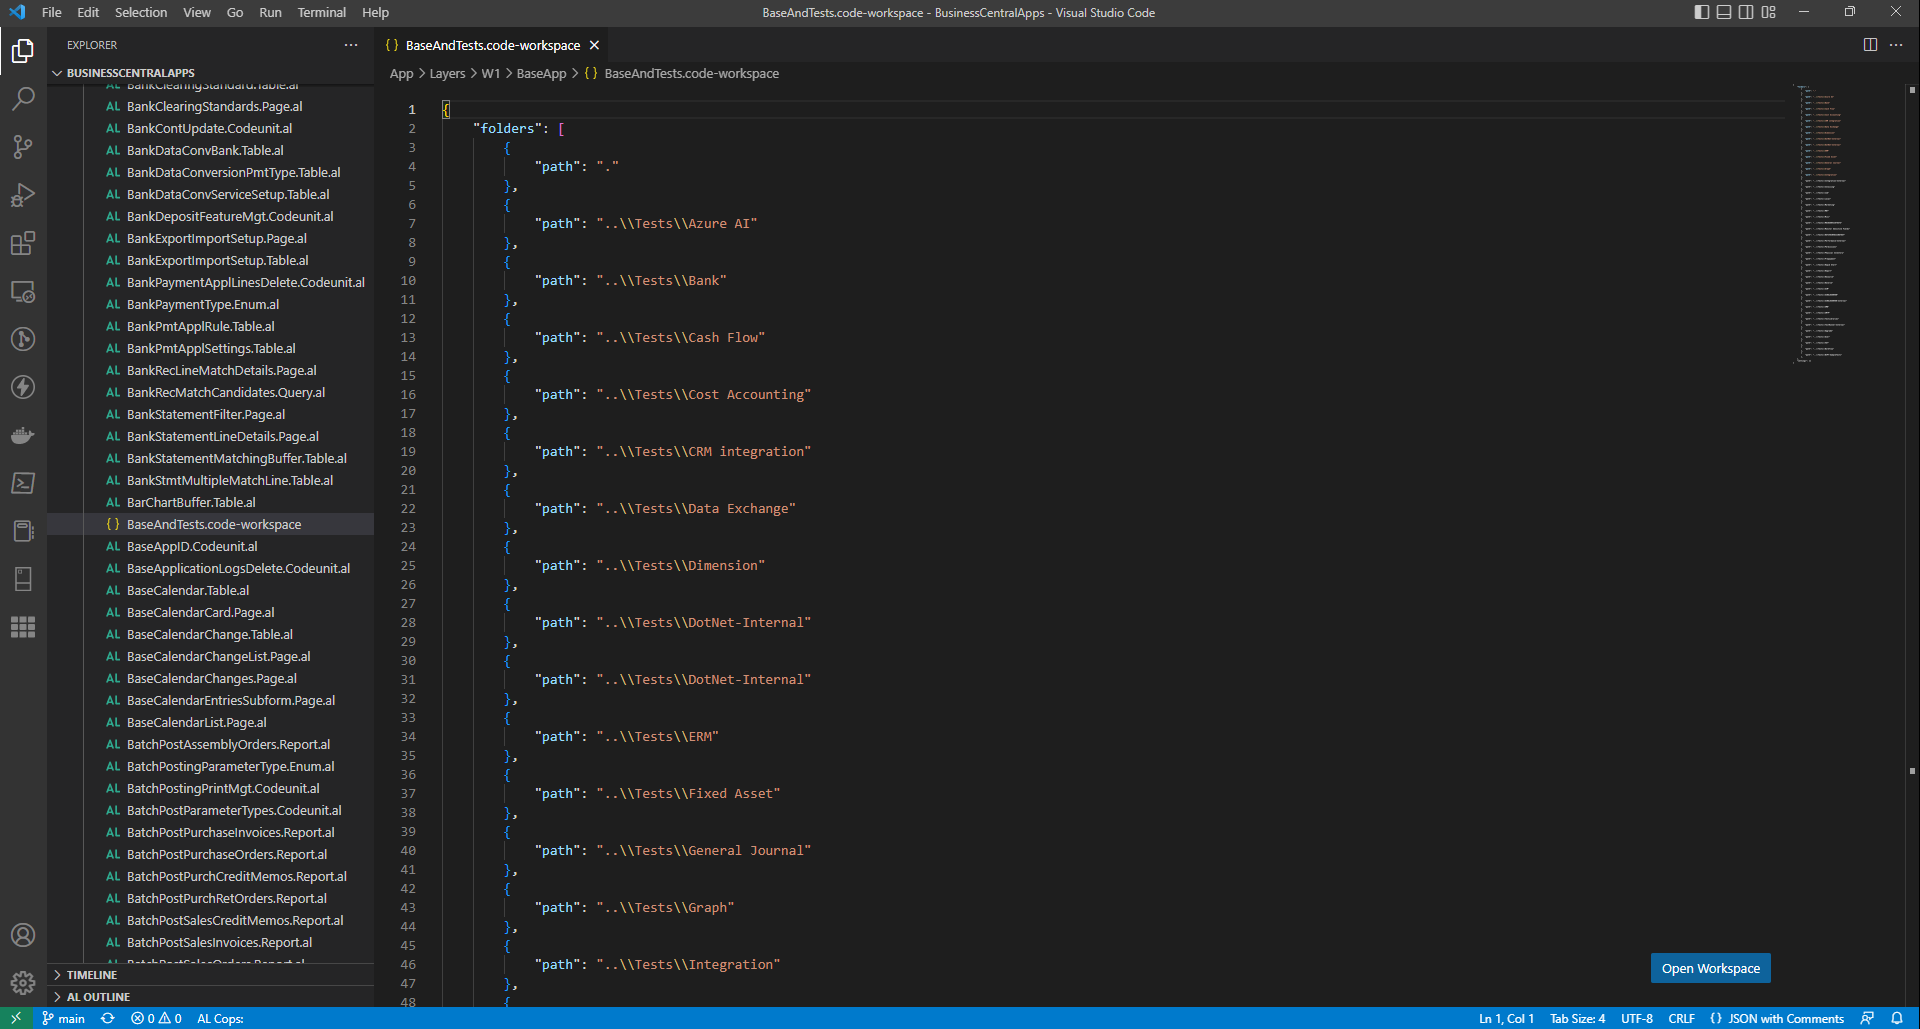
Now click on the button in the bottom right corner that says Open Workspace.
Update settings
In order for the AL Language extension to find all the necessary DotNet libraries and to be able to compile the app, we need to add/update the following settings: https://learn.microsoft.com/en-us/dynamics365/business-central/dev-itpro/developer/devenv-set-up-an-environment.
"al.assemblyProbingPaths": [
  "C:/Windows/Microsoft.NET/Framework64/v4.0.30319",
  "C:/bcartifacts.cache/sandbox/21.2.49946.51329", // type and version number depends on the downloaded artifact
  "C:/WINDOWS/assembly"
],
With a project that big we’d like to further optimize the performance of our VS Code editor. You can follow the instructions provided by the documentation: https://learn.microsoft.com/en-us/dynamics365/business-central/dev-itpro/developer/devenv-optimize-visual-studio-code.
"al.backgroundCodeAnalysis": false,
"al.enableCodeActions": false,
"al.enableCodeAnalysis": false,
"al.incrementalBuild": true,
"editor.codeLens": false,
"[al]": {
  "editor.formatOnSave": false
}
After applying all the changes, your .vscode/settings.json file might look similar to this:
{
  ...
  "al.assemblyProbingPaths": [
    "C:/Windows/Microsoft.NET/Framework64/v4.0.30319",
    "C:/bcartifacts.cache/sandbox/21.2.49946.51329", // type and version number depends on the downloaded artifact
    "C:/WINDOWS/assembly"
  ],
  "al.backgroundCodeAnalysis": false,
  "al.enableCodeActions": false,
  "al.enableCodeAnalysis": false,
  "al.incrementalBuild": true,
  "editor.codeLens": false,
  "[al]": {
    "editor.formatOnSave": false
  }
  ...
}
But… nowadays, especially because there are +20 paths in the .code-workspace file, I recommend to add the launch and the settings keys to the .code-workspace file. Defining the launch property in here is possible since AL Language version 10.1 (see the changelog11). If you need a more in-depth description, ZHU12 got you covered in one of his amazing blog post: https://yzhums.com/32067/. In short: the information is inherited by all projects, so we end up with only one configuration file that works for all paths.
To add the previous configuration to the workspace settings, open the command pallet (F1 or CTRL + SHIFT + P) in an opened workspace and search for workspace settings. Click on the be prompted option Preferences: Open Workspace Settings (JSON). This will open the BaseAppTests.code-workspace file to which we can now add all the informations needed for us to compile and publish the app in the next steps. This is how the file could look like after applying the changes:
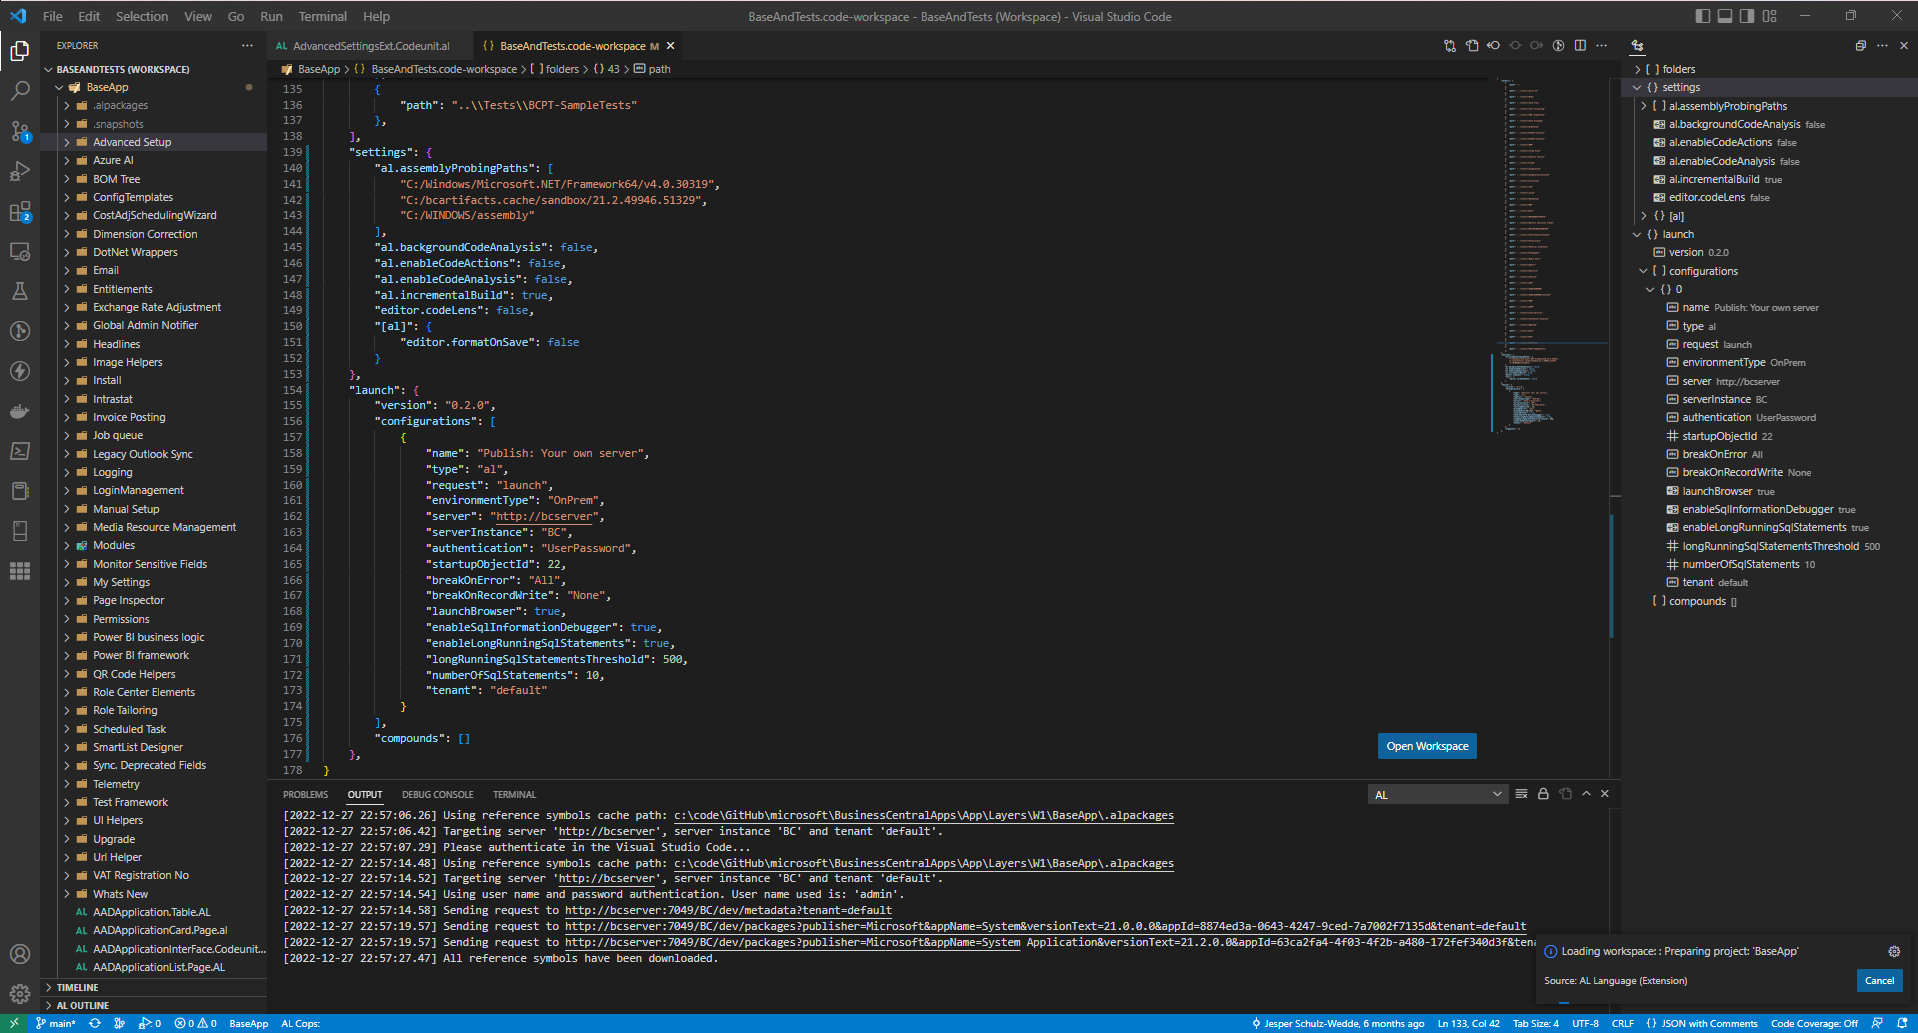
Which way you choose depends on your preferences.
At this point you can try and publish the Base Application, which most likely will end up with errors that we will fix in the next step.
Customize the app.json
We need to edit the app.json before we can publish the app to our local container. Enter CTRL + P on your keyboard and search for app.json base. The additional base keyword makes sure to filter the search results. Otherwise we would get too many files to choose from … efficiency is key.

change version
As the version numbers only change in their major and minor parts we can already assume that the installed version is higher due to the build and revision parts. All about the version numbers in Business Central you can read here: https://learn.microsoft.com/en-us/dynamics365/business-central/dev-itpro/administration/version-numbers
To make sure the version we publish is higher we can increase the major or minor part. I choose to increase the major part so that I don’t have to worry about it any time soon.
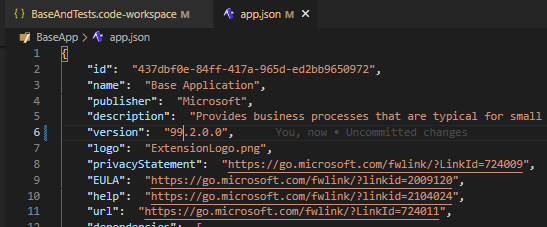
Fun fact: with this version number in place I might get some trouble with it by the year ~2062 when this version number becomes lower than the installed version.
add runtime
I’ve had to lower the runtime version to 10.1, as the default runtime (11.0 in this case) is not supported by the previously setup local container. You can try publishing it without adding this property.
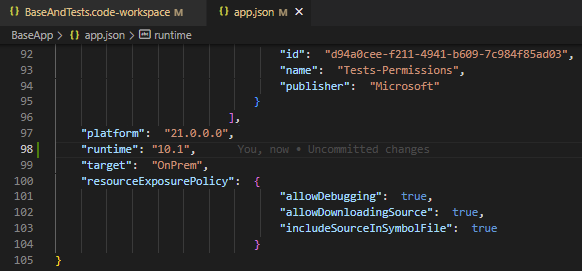
Additional information about choosing a runtime version can be found here: https://learn.microsoft.com/en-us/dynamics365/business-central/dev-itpro/developer/devenv-choosing-runtime
Correct AL Language version
One step that is often completely ignored is that we should develop with the correct AL Language version. We can do this by downloading the ALLanguage.vsix file from our previously created container by navigating to http://containername/ALLanguage.vsix via the browser of choice.
After we successfully downloaded the file, open VS Code. Navigate to Extensions and select Install from VSIX…. Select the downloaded file ALLanguage.vsix. Now reload VS Code.
Publish
Select a file that is included in the BaseApp path of the opened Workspace. This way we make sure that we will publish the correct extension.
Now publish (without debugging) (CTRL + F5).
This might take a moment, depending on your hardware specs and current usage of your host machine. Would highly recommend you to have more than 16GB of memory.

Publishing took about +8 minutes for me (i5-6300U & 16GB RAM).
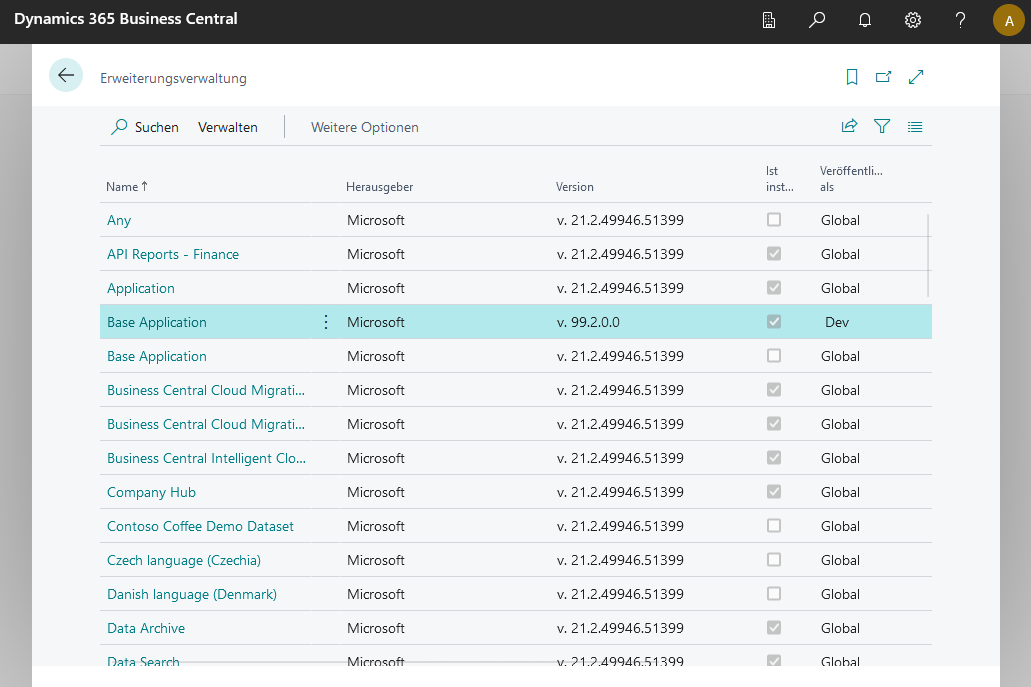
At this point you are ready to develop your first contribution to the contribution pilot. Please refer to the CONTRIBUTING.md13 in the microsoft/BusinessCentralApps GitHub repository9 on how to contribute.
Hope you learned something.
See you around 🦦
Credits to Frédéric Vercaemst14 who provided useful tips in the BusinessCentralApps discussion15.
-
https://freddysblog.com/2020/10/12/troubleshooting-business-central-on-docker/ ↩
-
https://www.powershellgallery.com/packages/BcContainerHelper ↩
-
https://marketplace.visualstudio.com/items/ms-dynamics-smb.al/changelog ↩
-
https://github.com/microsoft/BusinessCentralApps/blob/main/CONTRIBUTING.md ↩
-
https://github.com/microsoft/BusinessCentralApps/discussions/36#discussioncomment-4017093 ↩